Yipee. Got my upcycled magazine rack/end table from the talented ladies at Vintage Bleu. They turn questionable pieces of furniture that have seen better days into lovely shabby chic masterpieces. I spotted this table and realized it would make a perfect printer stand for my office. Thera graciously allowed me to choose the colors because I wanted the interior space to pop with a robin's egg blue treatment. They frequently get new pieces and are happy to work with customers on special requests. Thank you Vintage Bleu!
Emergency DIY window treatment
So we have what's called an "eyebrow window with legs" in our home. 'Tis a lovely thing and I adore shapes and spaces that aren't plain old squares. This lovely window however is in our bedroom and lets in way too much light to get a full night's sleep. So we think we'll just get some shutters or blinds like the other houses we saw while shopping for ours. AAAAAAAAAAHHHHHHHH. Sticker shock. It's around $700. My first car only cost $800 so I of course freaked the heck out and started thinking how we could make a temporary, but attractive solution. Our folks are coming to stay for the holiday so pressure was on. I've been keeping a stash of paper grocery bags and was seized by inspiration. I'd like to introduce the DIY cardboard and grocery bag rose window shade.
Here's the window in question. It has half a window treatment and now we know why. The previous owners probably said to heck with $700 for one stinking shade. This made the task easier as all I needed to fill was the topmost part of the arch.
First step was piecing together some cardboard in the shape of the opening of the window. I spray-painted the back so the house doesn't look ghetto when viewing from the exterior. I don't think my neighbors would appreciate the tape and moving box view.
Now for the steps to create the three-demensional roses:
1. Draw spirals of various sizes on grocery bags. Don't worry about being too precise.
2. Cut out your spiral by simply following the lines you've drawn.
3. Start twisting the spiral from the outside end of the sprial and continue rolling the paper til finished.
4. Add a little dollop of glue to the back to secure the rose.
Next cut out some leaf shapes and get an idea of your arrangement before you start gluing things down. If your cardboard is plain you don't have to do anything to it, but mine required painting so I threw on a coat of acrylic craft paint. Next I glued down all the pieces and let it dry for a couple of hours before installing.
Voila! The finished treatment. Let me know if you like or if you think my significant other's folks are going to think I'm crazy.
Etsy Love: Just Peachy
I've got peaches on the brain. They're everywhere right now in the grocery stores and farmer's markets and every time I smell one I'm transported back to summer vacation. We'd stop along roadside produce stands on the way to Myrtle Beach and peaches were a staple. Here are a few peachy things I admire:
1. Peach shabby chic rose and aqua earrings at Iloniti
2. Peach Louise dress by Ruffled Clothing
3. Peach Vintage teacup and saucer by Alphie Bug
Mason Jar Candelere Extraordinaire

Now this is what I call incredible. An chandelier turned into a candelere (candles, not electric) using the humble mason jar. Head over to Shabbyfufu to get the full DIY scoop.
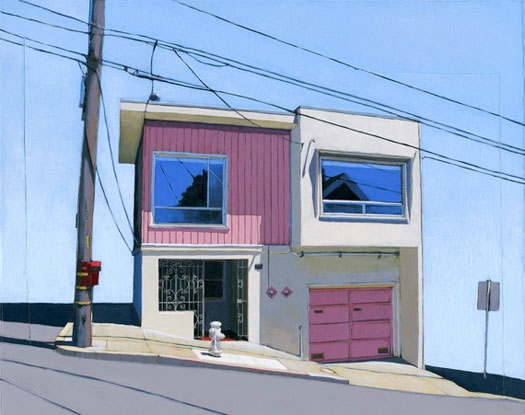
Artist Leah Giberson

Oh I'm loving the work by artist Leah Giberson. She has a very unique approach to her creations. It's best described in the artist's own words below:
My current body of work falls somewhere between the worlds of photography, painting and collage. I begin with photographs of seemingly ordinary and mundane scenes, which I then paint directly upon to distill and reveal the visually poignant moments that exist all around us, but are often overlooked.
There is a quiet anxiety and loneliness in these images of isolated houses, empty chairs, abandoned pools and vacant...
Handmade Heart Art
My Etsy inspirations today come from the heart:
1. Shy Wild Heart rustic barb wire sign by The Lonely Heart
2. Upcycled Heart frame created with found items by Studio One Sixty Two
3. Red Copper Keyhole Heart journal by Into the Blystic
4. Dictionary Heart Ornaments set by Dervish
Paper Clip Dress
There are some great projects over at cut out + keep, a rich craft community site full of tutorials and forums. This dress made of 7,500 paper clips is quite the eye-catcher. I wonder what kind of jingly, jangly sound it might make ...


