Now I like a paper doll that has her own paper doll—that's style. Amy Earles has some lovely reproductions of her hand-painted creations at her Etsy shop. I love the richness and delicacy she achieves using gouache.
Photo booth bash
It seems that throwing photo booth parties, or having one on hand for weddings, graduations, etc. are all the rage right now. Check out Little Retreats Esty shop for handmade "props" to give your subjects something to spice up their photos.
Curiosity Calendar of the Month Club
Happy July! Check out this free DIY camper calendar set from the Curiosity Group. They offer a new calendar every month to download, print and assemble here.
| via how about orange
Cardboard creations by Seequin
In my quest to see who else is working with cardboard I came across these whimsical chandeliers and candelabras by Seequin. Tres cool.
Emergency DIY window treatment
So we have what's called an "eyebrow window with legs" in our home. 'Tis a lovely thing and I adore shapes and spaces that aren't plain old squares. This lovely window however is in our bedroom and lets in way too much light to get a full night's sleep. So we think we'll just get some shutters or blinds like the other houses we saw while shopping for ours. AAAAAAAAAAHHHHHHHH. Sticker shock. It's around $700. My first car only cost $800 so I of course freaked the heck out and started thinking how we could make a temporary, but attractive solution. Our folks are coming to stay for the holiday so pressure was on. I've been keeping a stash of paper grocery bags and was seized by inspiration. I'd like to introduce the DIY cardboard and grocery bag rose window shade.
Here's the window in question. It has half a window treatment and now we know why. The previous owners probably said to heck with $700 for one stinking shade. This made the task easier as all I needed to fill was the topmost part of the arch.
First step was piecing together some cardboard in the shape of the opening of the window. I spray-painted the back so the house doesn't look ghetto when viewing from the exterior. I don't think my neighbors would appreciate the tape and moving box view.
Now for the steps to create the three-demensional roses:
1. Draw spirals of various sizes on grocery bags. Don't worry about being too precise.
2. Cut out your spiral by simply following the lines you've drawn.
3. Start twisting the spiral from the outside end of the sprial and continue rolling the paper til finished.
4. Add a little dollop of glue to the back to secure the rose.
Next cut out some leaf shapes and get an idea of your arrangement before you start gluing things down. If your cardboard is plain you don't have to do anything to it, but mine required painting so I threw on a coat of acrylic craft paint. Next I glued down all the pieces and let it dry for a couple of hours before installing.
Voila! The finished treatment. Let me know if you like or if you think my significant other's folks are going to think I'm crazy.
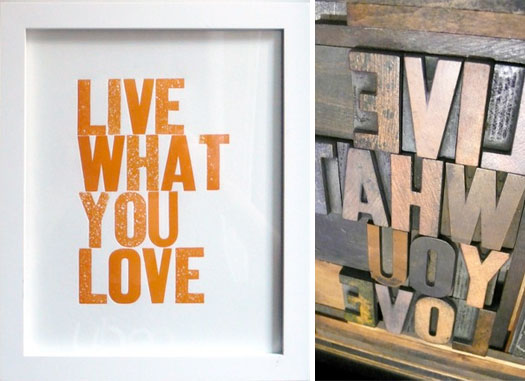
The goal: Live What You Love

This letterpress print by Hijiri Shepherd sums it up simply and beautifully. Live what you love. This is the goal that I'm working towards. Life is way too short to not do this.
Wine tasting customizable invitation
New wine tasting invitation is now available in my print on demand shop at Zazzle. You can change the font and color of the font as well as the size and placement of the text. If you do have a wine tasting, please invite me. Just kidding. Actually I'm not.


